

Table of Contents
Essential Elements of WimbaSCAN
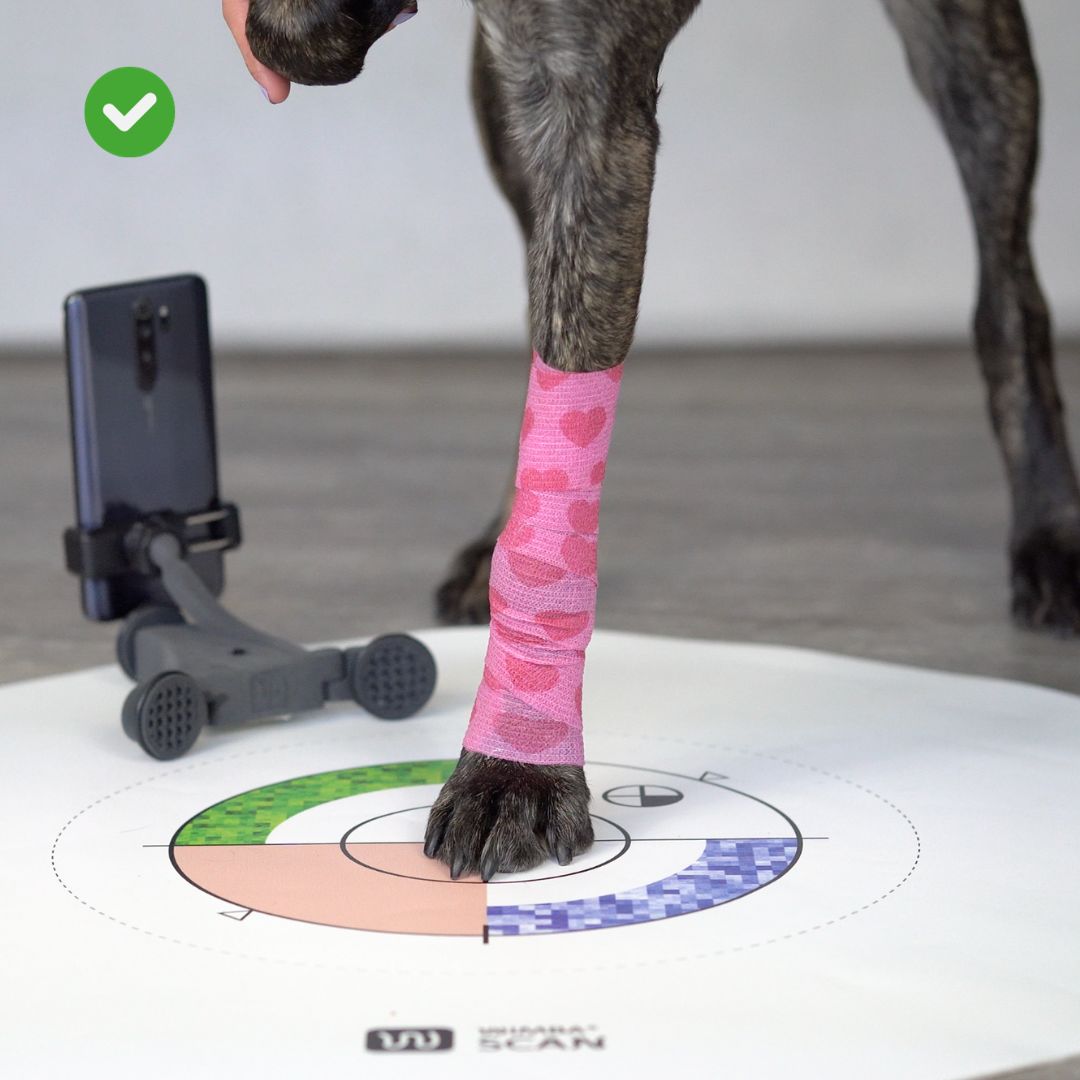
WimbaSCAN - patterned vet wrap
Different Wrapping Levels for Different Devices
Essential Elements of WimbaSCAN
To perform a limb scan, the items provided in WimbaBOX are required:
- WIMBA patterned vet wrap and Sleeves
- Autodolly
- Calibration mat
In addition, a cohesive bandage may be useful.
WimbaSCAN Checklists - PDF with the most important steps when scanning
WimbaSCAN - WIMBA patterned vet wrap and Sleeves
The patterned vet wrap is used to wrap the limb prior to scanning. The pattern enhances scan accuracy by improving visual reference points while allowing for firm, even application around the limb. Some boxes may come with patterned sleeves that can be used in the same way as the vet wrap. Sleeves are in sizes S/M/L. Be sure to choose the right size so that the sleeve fits the dog's leg very well.
Note! Our recommendation is to use our patterned Vet Wraps, but any high-contrast cohesive bandage can be used as an alternative.

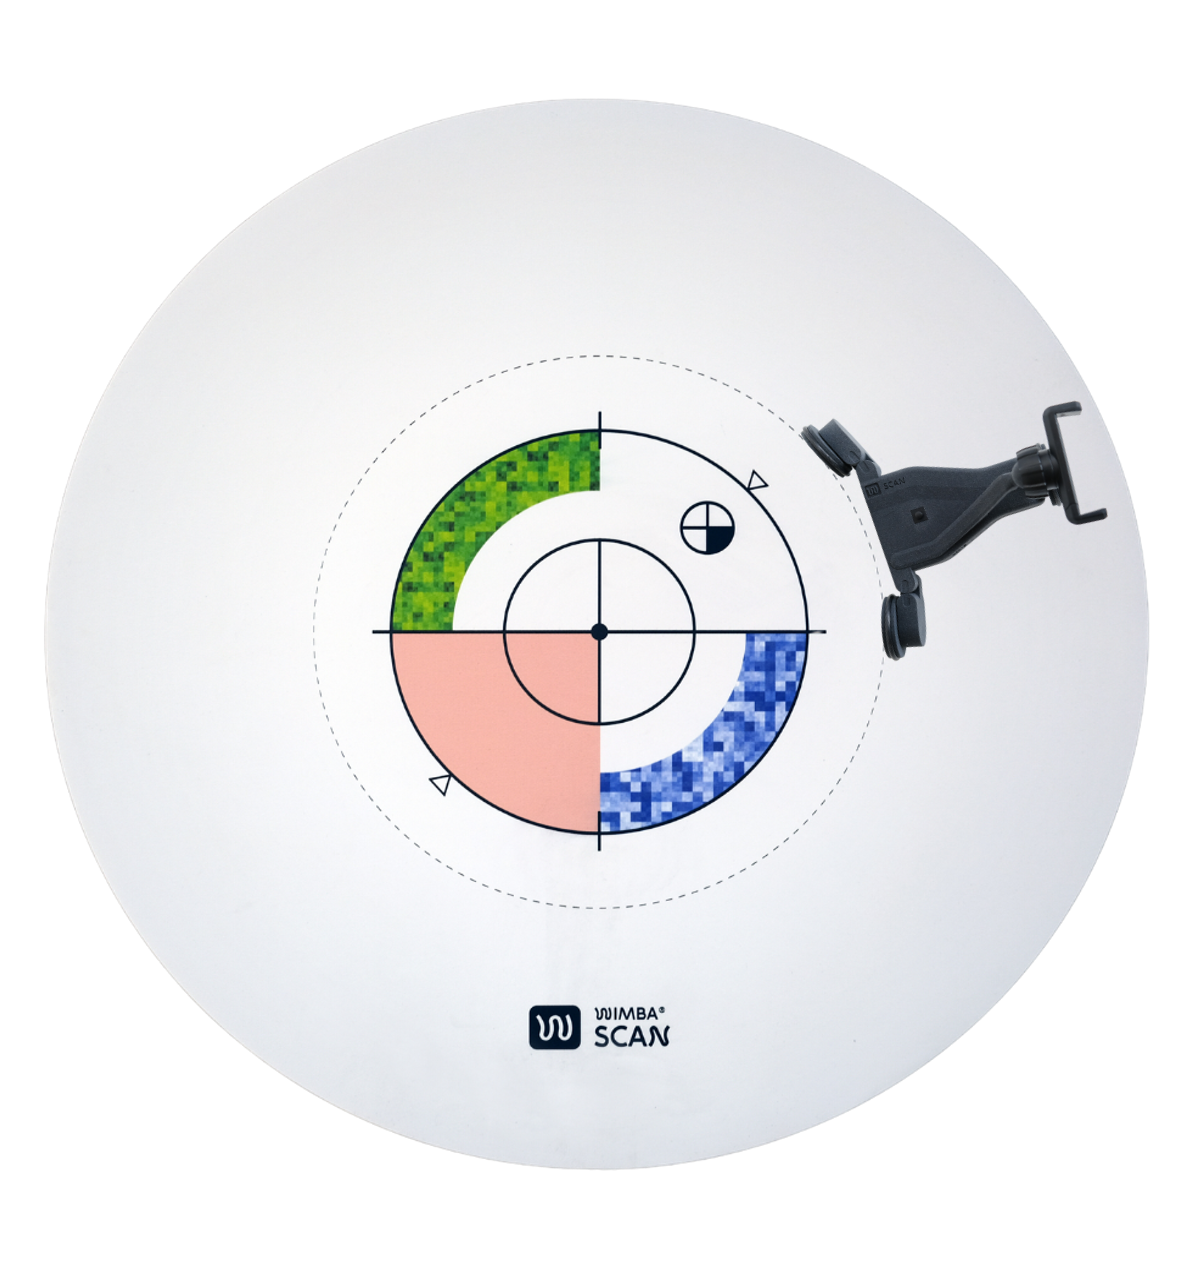
WimbaSCAN - calibration mat
The calibration mat allows you to properly scale the limb model during post-production of your scans. It is required for the WimbaSCAN process.
WimbaSCAN - Autodolly
Autodolly is a device that aids the scanning process (WimbaSCAN) by keeping the phone in a stable position and automatically driving around the object that is being scanned. The WimbaSCAN Autodolly's ability to set any arm angle allows data acquisition regardless of limb size.
WimbaSCAN's original solution allows for smooth video recording of the entire limb so that a digital model of the limb can be reconstructed and a customized orthosis can then be made. The Autodolly's arms are adjustable, allowing the device's torsion radius to be adjusted, thereby matching the appropriate frame to the size of the object being scanned.
Autodolly consists of:
- Phone holder
- Arms
- Micro USB charging port
- ON/OFF switch

Specification:
- Maximum load: 1 kg
- Battery: 550mAh Li-ion; Nominal voltage: 7.4V
- Direct charging via micro USB port
- Dimensions 17 x 13 x 10 cm
- Weight: 270 g
- Case material: Polyamide
- Operating conditions: temperature 0°C to +35°C (32ºF to 95ºF), humidity: 20%-60%
Notes:
- WimbaSCAN must be operated only on a level and stable surface.
- Do not use the WimbaSCAN device if the holder and phone are not properly mounted.
- Do not turn the wheels forcefully.
- Do not tamper with the device.
- WimbaSCAN is intended for use only in veterinary practices and clinics. The device is not intended for other purposes.
- WimbaSCAN contains small parts that can be swallowed by animals or children. Should be used only under adult supervision.
Making a Scan
WHAT YOU NEED:
- WimbaBOX (mat, Autodolly, sleeves)
- Smartphone capable of recording HD (1080p) or better quality videos
Step 1 - Environment
- The room should be bright, so no shades will come up on the limb.
- Be careful about any strong and pointed sources of light: they can cause flashes and make the scan unable to process.
Step 2 - Mat
Place the mat on an even surface to reduce the shake of the movie.
- The floor should be even, rough without carpets. Don’t lay the mat on the couch, bed or unstable table.
- Smoothen the mat to make sure it’s without any wrinkles and waves.
- Printed circles on the mat allow you to place the scanned limb correctly. Coloured areas are used by the algorithm to process the scans.
- During scanning, green and blue areas should be visible.
- Keep your mat clean, it is waterproof so you can easily wipe off any dirt.
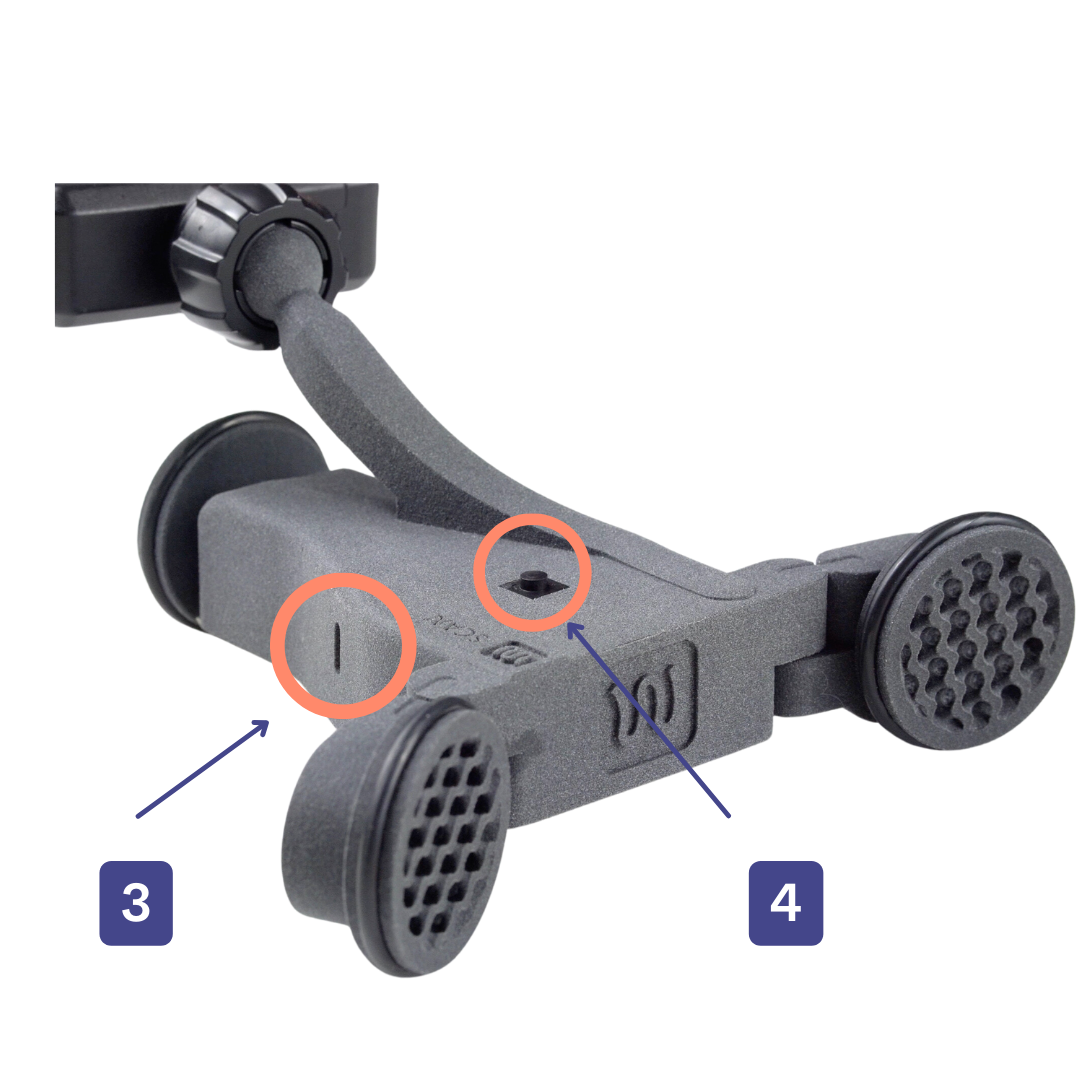
Step 3 - Autodolly
Place the Autodolly on the mat and adjust it to your patient.
- First, set up its wheels.
- Use a dotted circle on the mat as a reference. Grab wheels and adjust them for the desired radius by giving them appropriate angles.
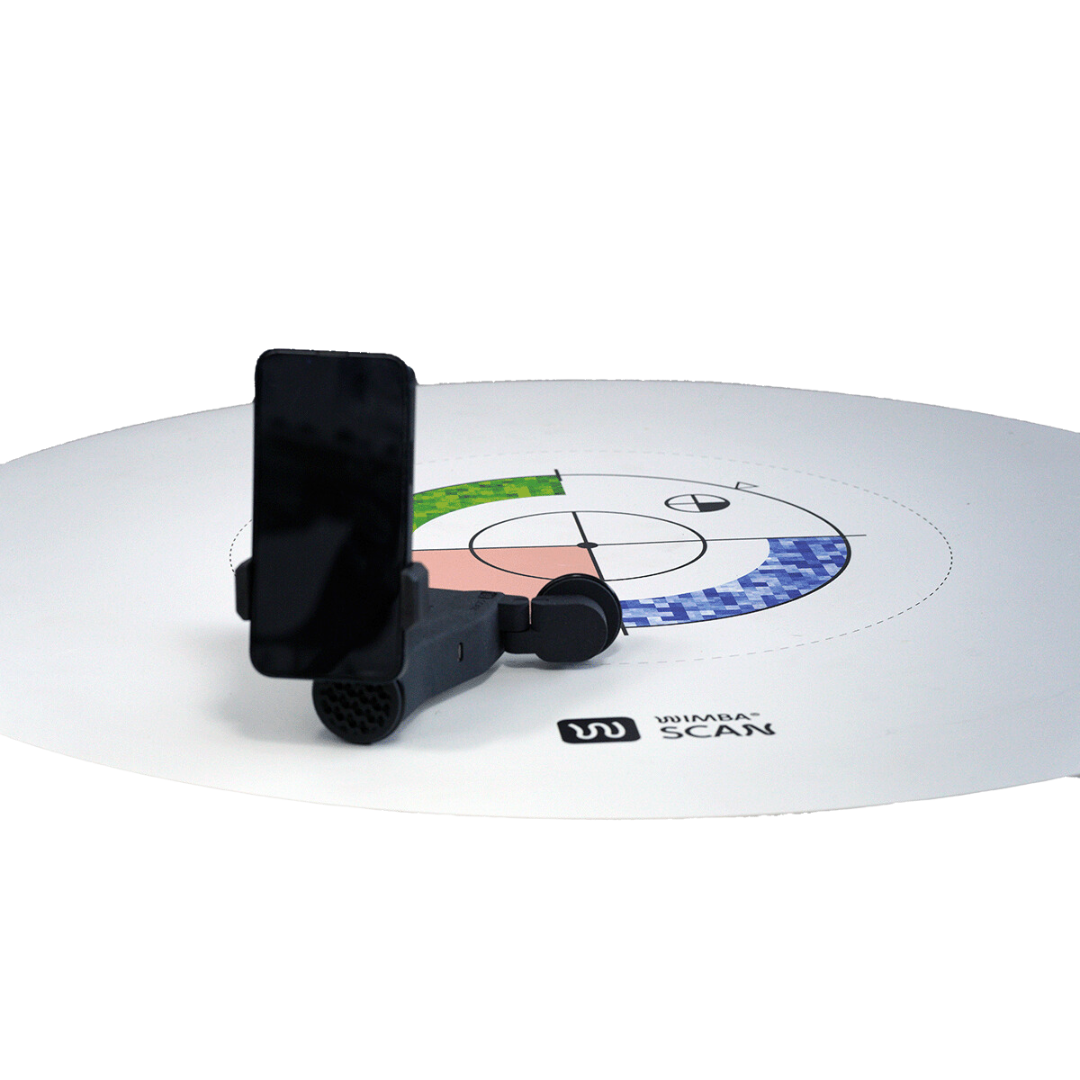
- Push the start button and let it do a few trial rounds on its own.
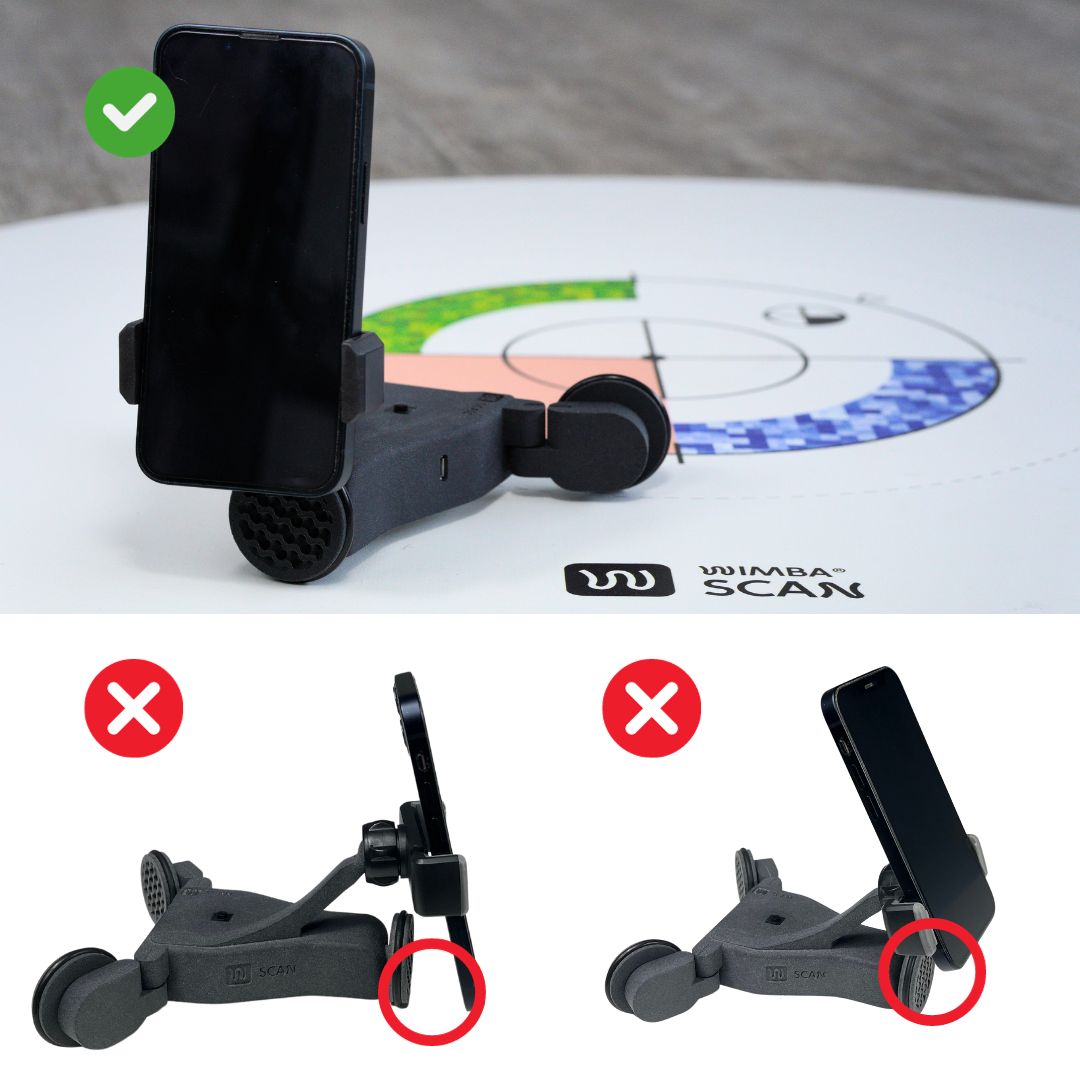
- If all works well, insert your phone.
- Stretch the arms of the phone holder to make a place for the smartphone, put the phone in and let the arm tighten on the phone.
- Let it do another round with it.
Note! The position of your phone determines the stability of the Autodolly. If the smartphone is inserted unevenly and is making the dolly collapse, reinsert it a little bit lower, but high enough to not restrict the adjustment of smartphone angle or movement of the Autodolly itself, and try again.
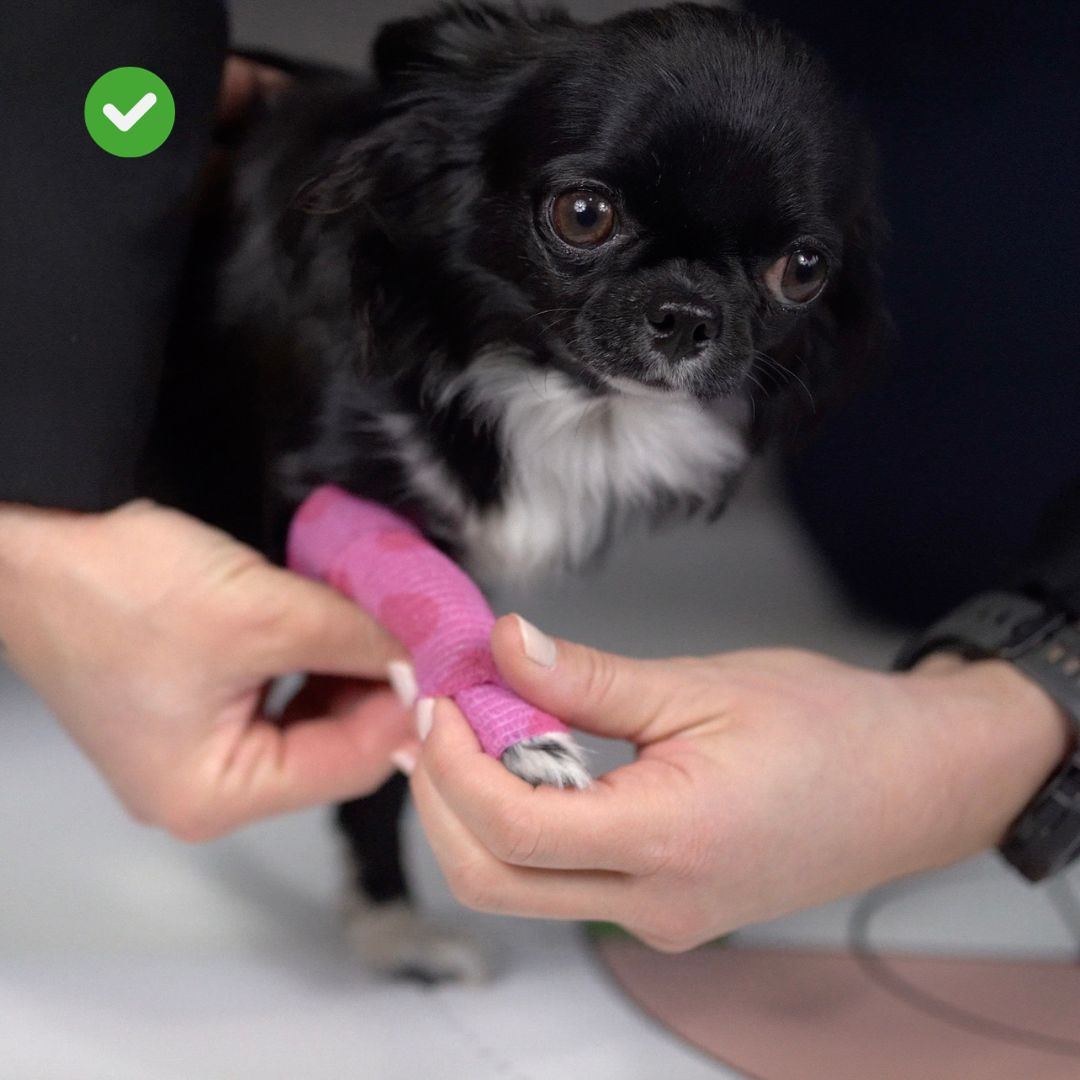
Step 4 - Sleeve
Inside your WimbaBOX, you will find three sleeves of different sizes. Choose the one that best fits your patient and place it on the limb you wish to scan.
- The sleeve should fit perfectly—neither too loose nor with any wrinkles.
- If it’s impossible to achieve that with any of the attached sleeves, you can use a vet wrap (a cohesive bandage).
- Make sure to choose one that is patterned, not plain. Also, it cannot be in the same colour as the background of the video.
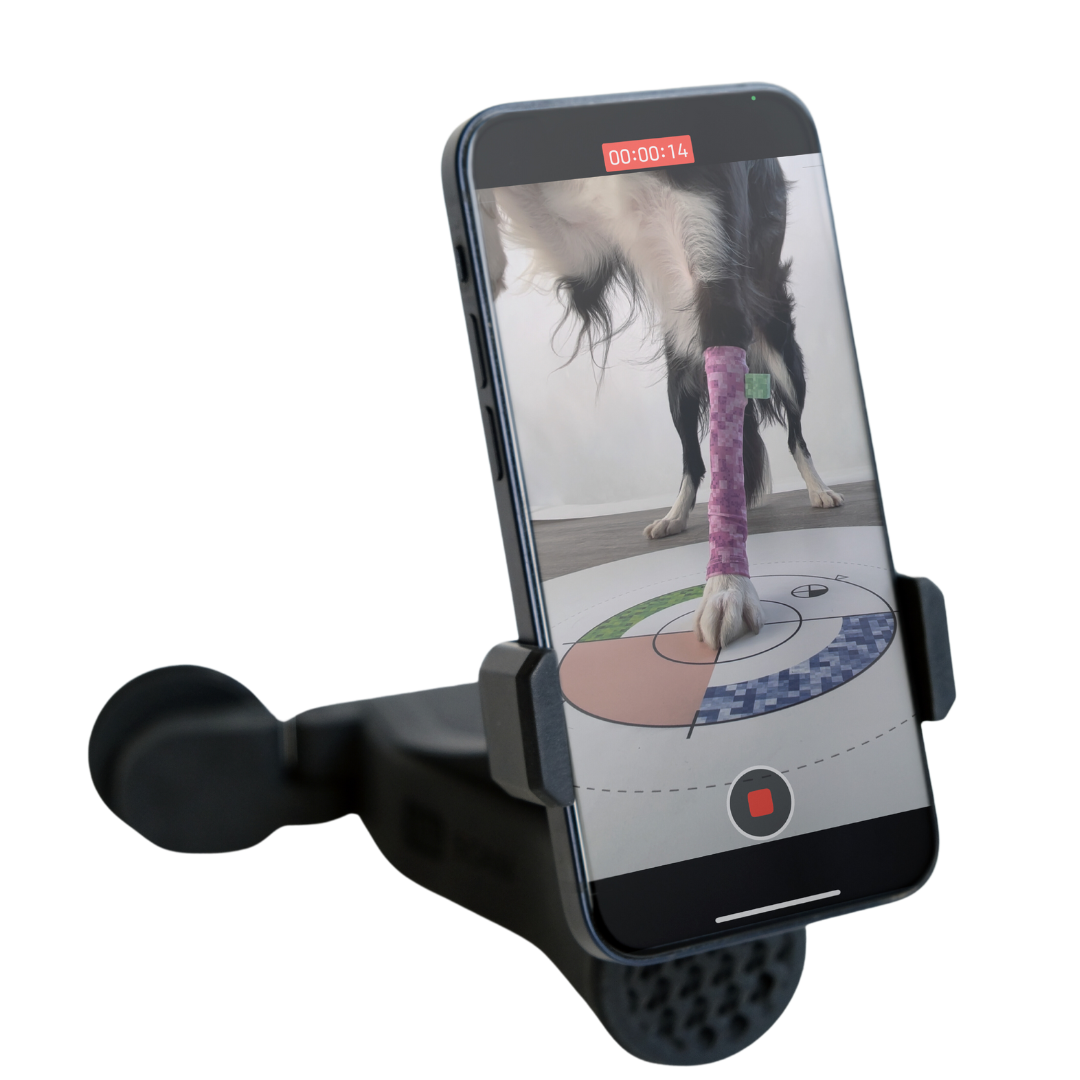
Step 5 - Make a scan!
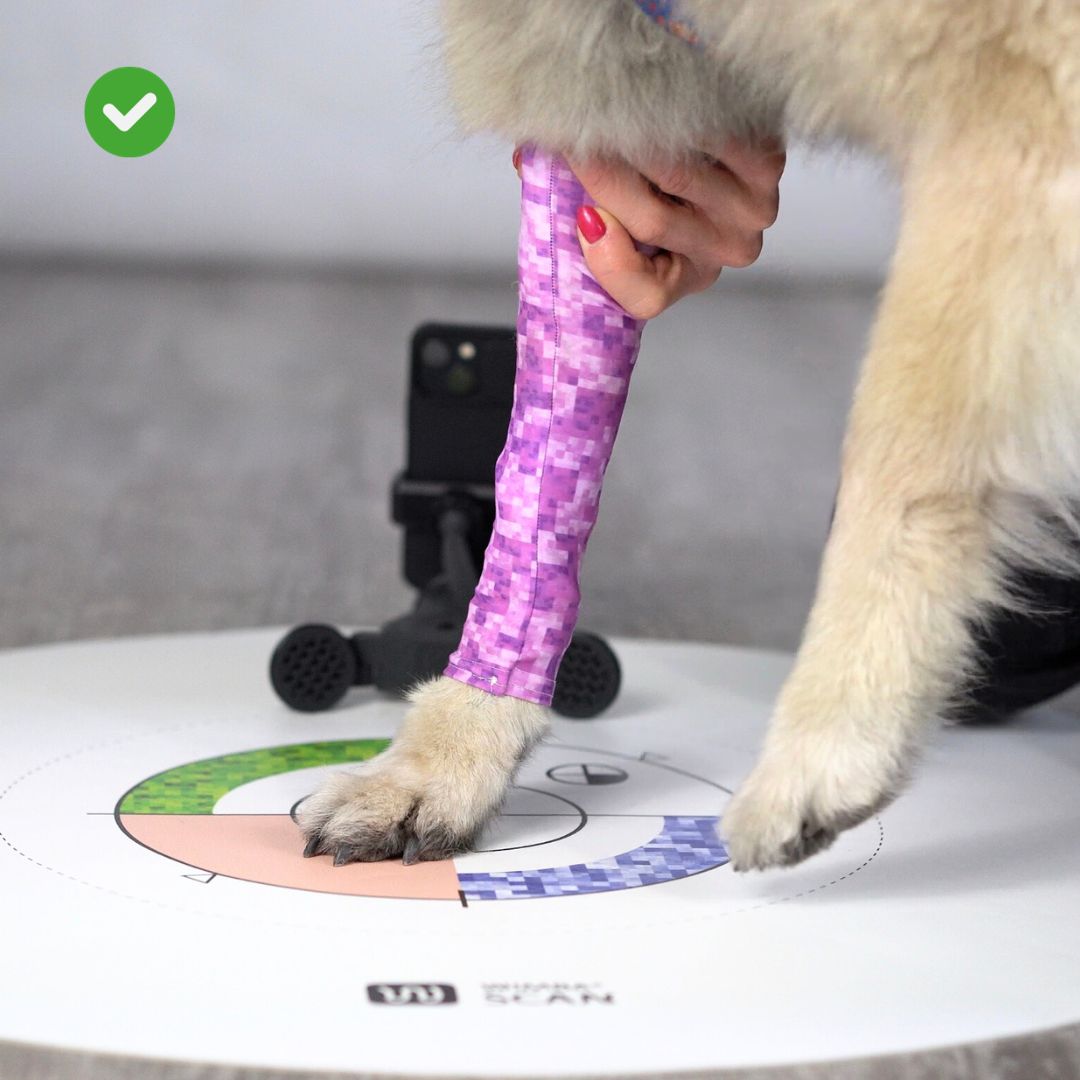
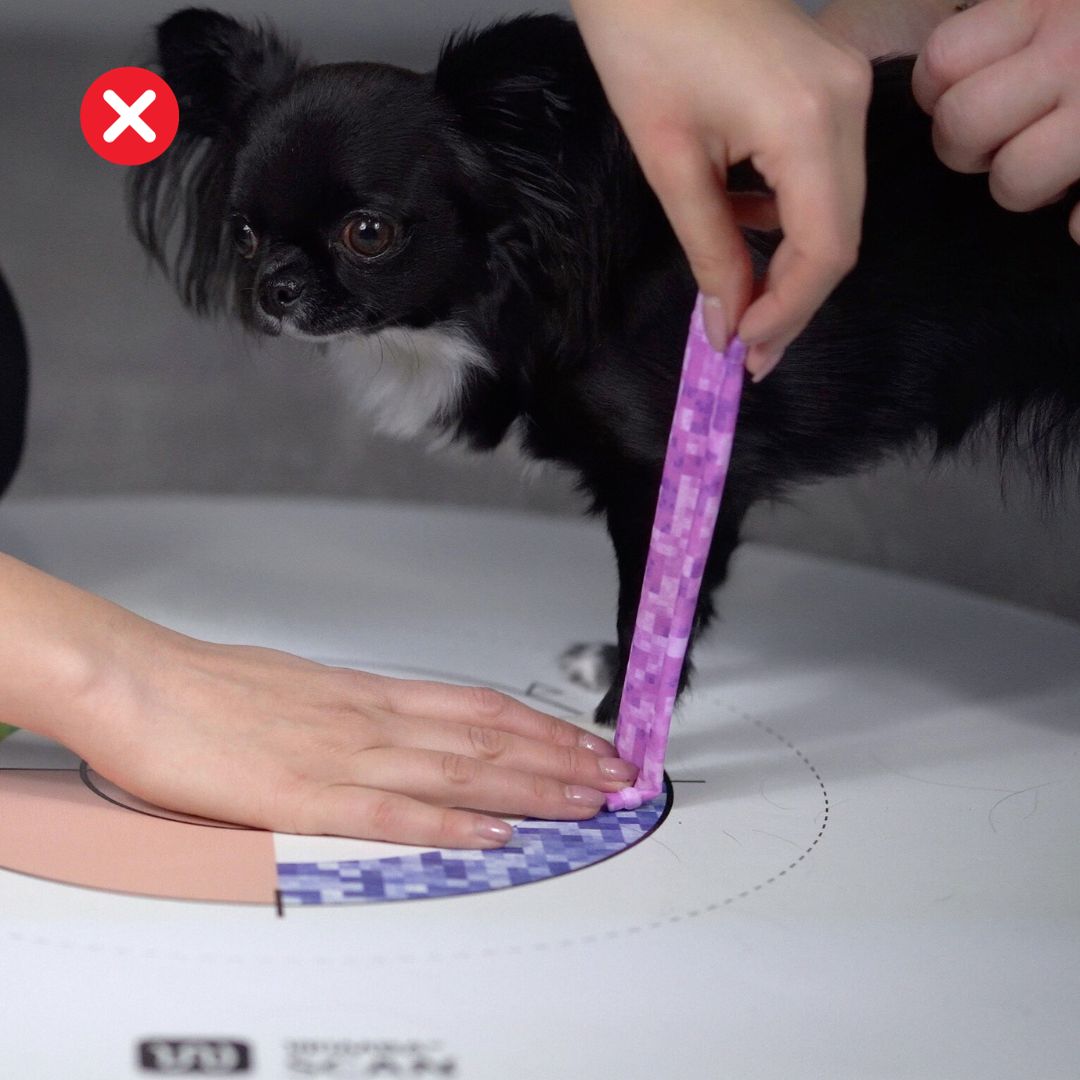
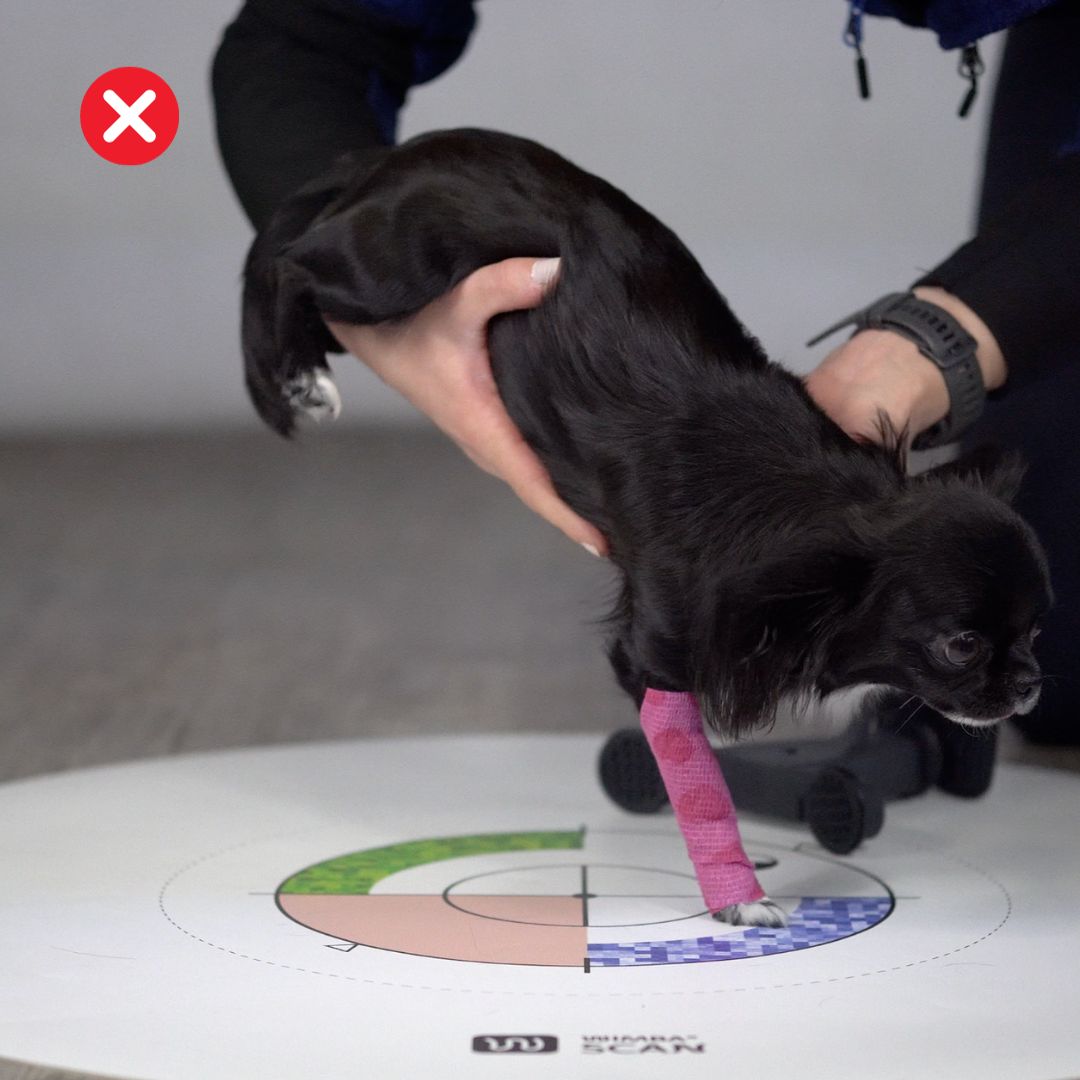
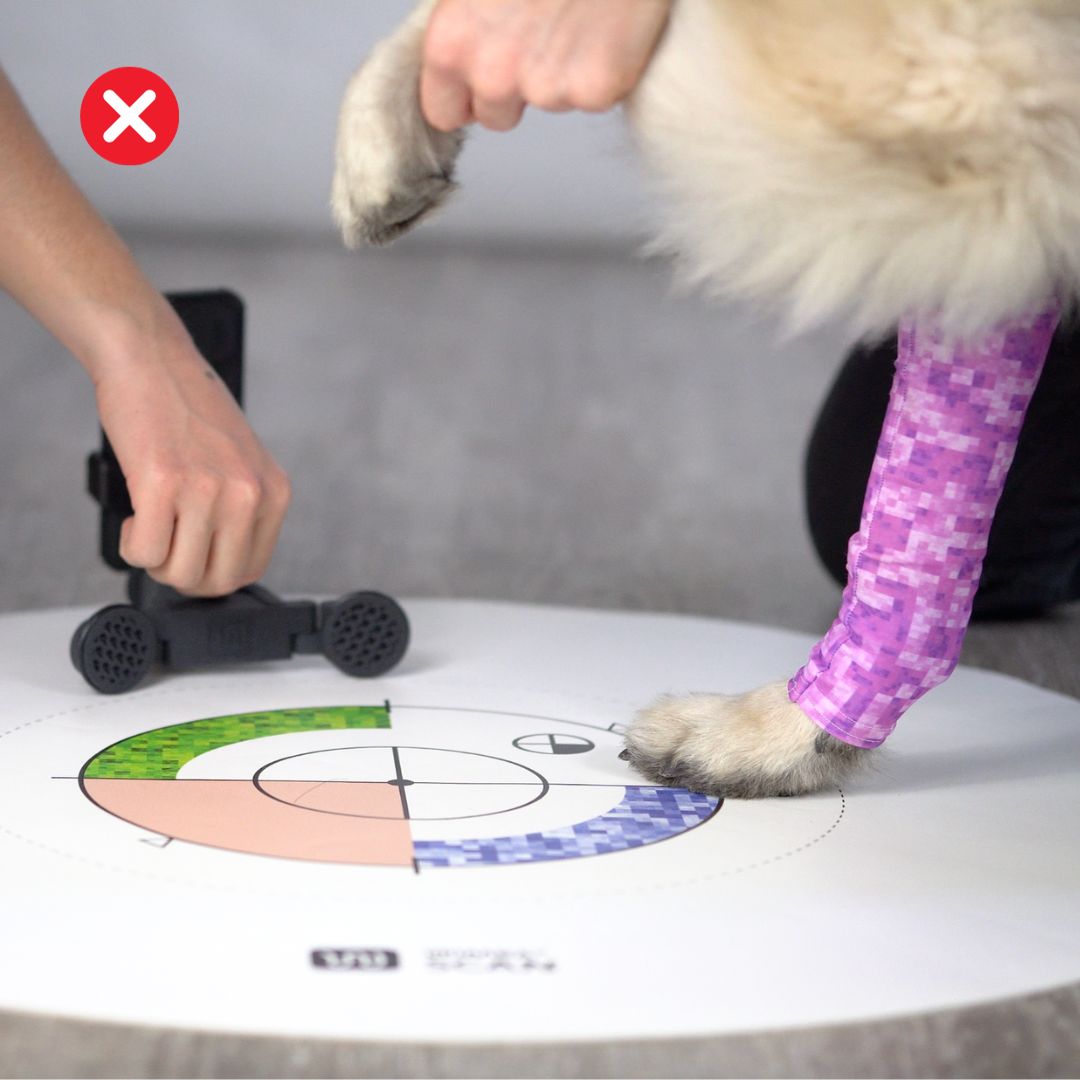
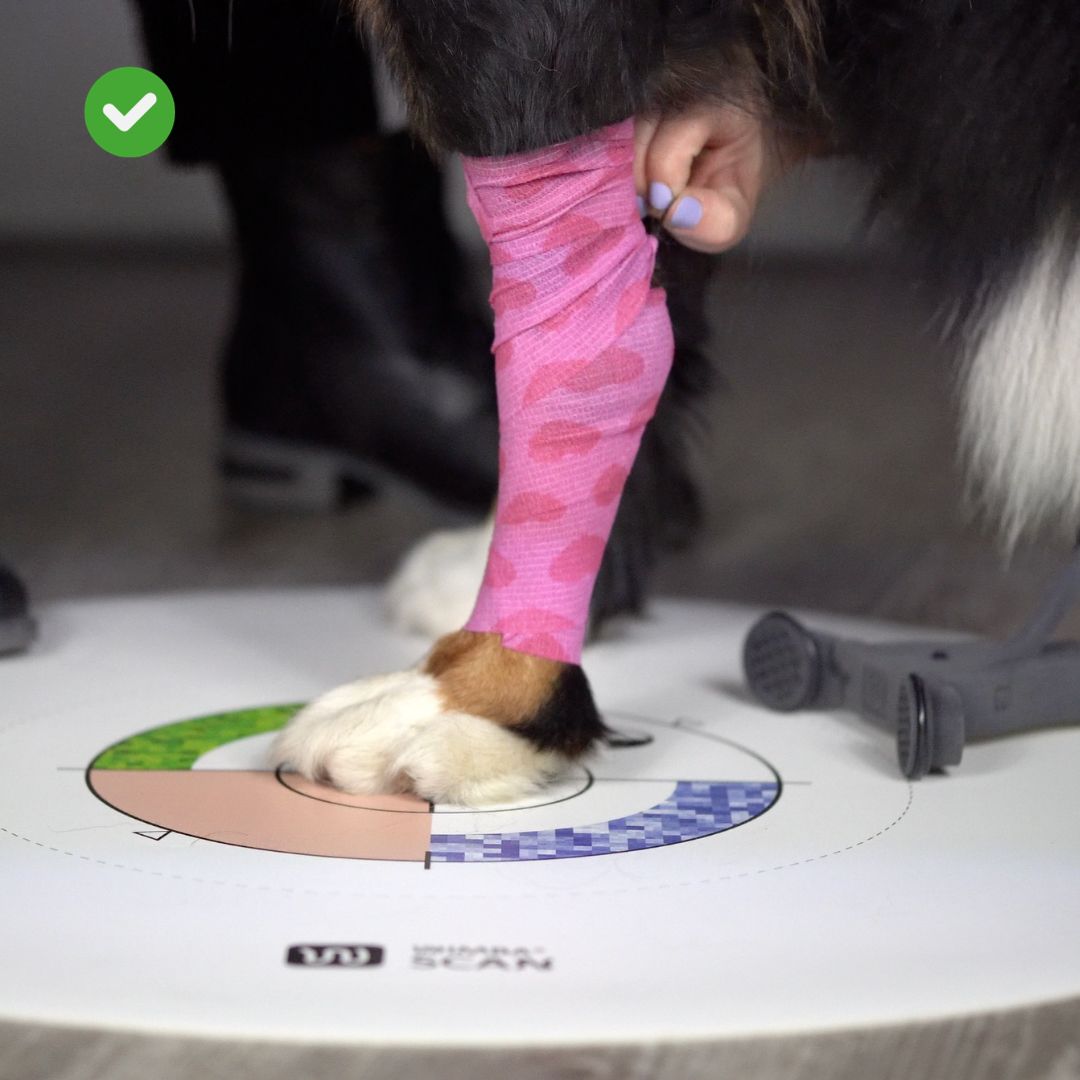
- Place the previously prepared limb of the animal on the mat, so that the axis of the limb falls in the centre of the mat, bend and hold the other limb so that it does not interfere with the recording.
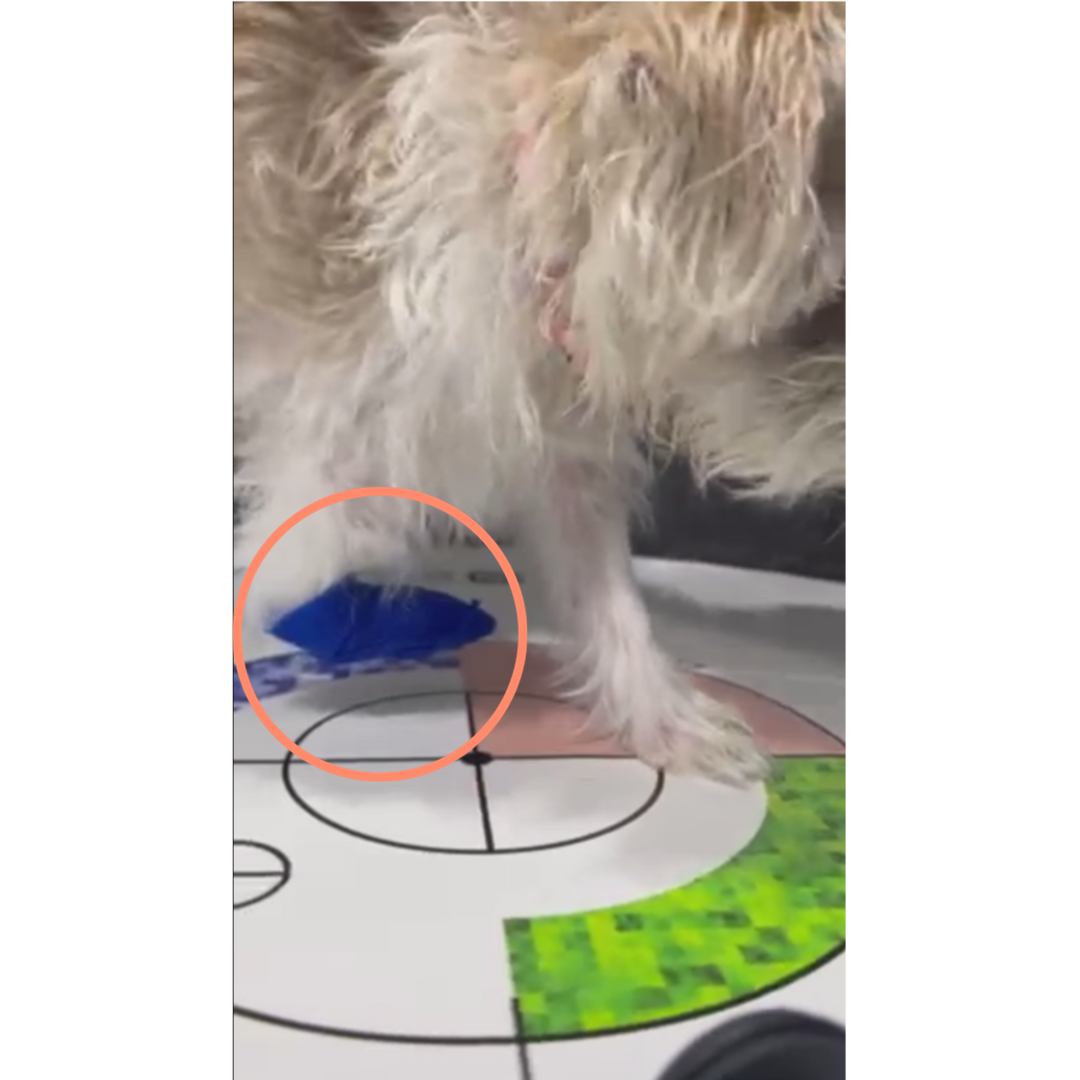
Note! The dog's limb should be naturally weighted. If this is not possible, we suggest including a video of how the animal walks.
- After making sure the limb is in focus in the camera frame, turn on the device. Autodolly moves at a constant speed performing a full rotation in about 10 seconds.
- During recording, it is essential to make sure that the entire limb remains stationary and in focus in the frame. We suggest allowing the Autodolly to perform more than one circle - the more material we have, the easier it is to receive a good 3D scan out of it.
In case the recording does not meet the guidelines, please record it again.
WimbaSCAN: Different Wrapping Levels for Different Devices
Different devices require different levels of wrapping when using WimbaSCAN.
Wimba Carpus Pro and Wimba Carpus Pro with paw support
WRAPPING: From the paw to the elbow

Wimba Tarsus Pro and Wimba Tarsus Pro with paw support
WRAPPING: From the paw to the stifle

If the wrap is sliding down, try adding additional wrap around the lumbar and abdominal area.

Wimba Pro Stifle Standard and Wimba Pro Stifle Pro Mini
WRAPPING: Start wrapping from the paw up to the most proximal point possible on the affected hind limb. If the wrap is sliding down, try adding additional support around the lumbar and abdominal areas.
Add a patella marker.
